Feeds:
Posts
Comments

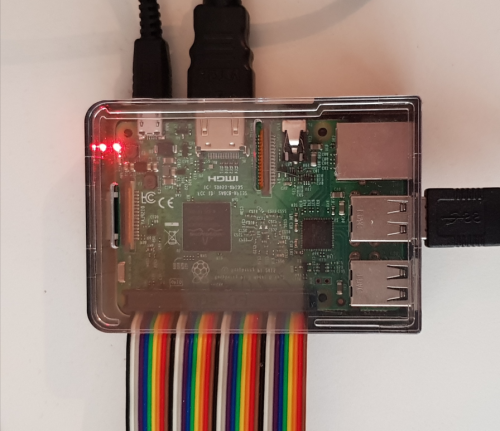
Goal: run java code on your RPI 3 that connects with BLE devices

September 2017

rpi

It is non-trivial to achieve this, but fortunately there was this excellent guide by Michael Haugk: http://fam-haugk.de/starting-with-bluetooth-le-on-the-raspberry-pi

The guide gives step by step instructions on how to install the necessary libraries:

1. Install and test bluez
2. Install cmake
3. Install tinyb

Fortunately for us, the latest release of Raspbian now has good support for bluez and cmake, so these steps can be simplified if you start with a fresh copy of Raspbian.

I’ve used the september 2017 release of raspbian stretch, which can be found here: https://www.raspberrypi.org/downloads/raspbian/

1. Install and test bluez

The latest edition of cmake is now the default for this platform. So after installing the raspbian image to the memory card, just run these commands:

sudo apt-get update
sudo apt-get upgrade

(just press enter to answer Y when the tools ask for confirmation)

You now have access to the hcitool. Scan for nearby ble devices with:

sudo hcitool lescan

2. Install cmake

The good news is that the standard version of cmake is now the latest version, that will allow us to build tinyb. Install it with the following command:

sudo apt-get install cmake

3. Install tinyb

This you still have to do by hand. Therefore I refer you Michael Haugk’s manual:

http://fam-haugk.de/starting-with-bluetooth-le-on-the-raspberry-pi

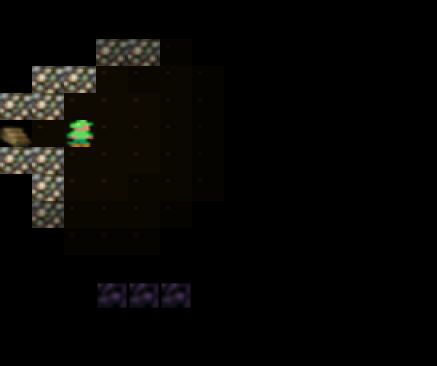
Time to add some new features; specifically it is time to add the monsters. Not just the critters described earlier, but real monsters. Those that set the tone of the game. Monsters you cannot fight and even cannot really see because they exude darkness themselves. Images like this inspires me…

Time to get to it! The simplest of these are monsters that just follow the walls of the cave. So it is time to down and get write some low level algorithms! Left hand search, should be simple, right?

Err, well, maybe. My gut feeling says that enemies should not just roam the entire map, but be confined to certain areas. This way they represent something to discover once you progress to that area.

Ok, so how to split up my dungeon into areas?

foto-handwerk-small

.. Errr..

That’s not that easy, actually. I played with some ideas on paper, but they did not really seem to work. So how to procees? Well, I could just generate a batch of caves and manually decide what would constitute good areas for monsters. Even better: manually draw some patrol paths, and then see if there is a common formula that I could implement in code.

And this is where I love the fact that I invested some time in getting to know the Gimp, it was easy to play around with this stuf. This is what I ended up with:

166-1-Base map

So, I came up with the following rules:

– patroll routes do not cross acid
– patroll routes do not venture into narrow corridors
– patroll routes must have a certain minimum length

Ok, but how to find these routes? While thinking about corridors I thought about what defines a corridor? It is the distance of its floor tiles to the nearest wall tile. A corridor consists of floor tiles that are all connected directly to wall tiles. Good, I can use this. Let’s make a map of the dungeon that shows for each floor tile the distance to the wall tiles.

And because I’m a sucker for visualisation, I started with just showing the number of non-wall neighbours for each floor tile.

q-166-2-numberOfNeighbours

Now calculate the distance to the walls, and you get something more useful:

q-166-3-DistanceToWall

Ah, a pattern emerges: the “1” distance tiles are clearly the route the patrol will follow. Only the routes still contains small corridors? How to removed them? What if we state that corridor tiles are those tiles that do not have any neighbour of distance “2”. Let’s set the corridor tiles to distance “0” just to see them clearly.

q-166-4-ExcludeCorridors

Actually, looking at this picture shows that it is very easy to create a route. We can take any floor tile with distance “1” and just follow the adjacent distance “1” tiles until we end up back where we started. And voila presto!

q-166-6-Routes

Maybe it is more visual if we add a new set of tiles that indicate the direction that each step is taking.

q-166-7-Directions

Glorious! And it is not even the pathing algorithm that makes me smile so much, but the fact that I can visualize it like this! Now for a final check, let’s see how the generated path compare to my initial idea of what patrol routes should look like.

166-8-Directions_with_overlay

That seems to have worked out rather nicely :)

Milestone 1

Lo and behold, the first release of the game. It is very very alpha, but still a working game. I invite you to download it and give it a try! I am happy with any and all kinds of feedback. Just write a reply in the comments.

I will emphasize that I am interested in all kinds of feedback. If the download did not work, or Java gave problems, please let me know. At this stage everything is good info even if it does not regard the game itself.

darkmines milestone 1

Now the game is a Java game, and as such requires Java to run. So there are two download options:

1. You have Java installed on your computer.

Download the game from Google Drive, no login required. (~650 KB)

The game can be downloaded as an executable jar file. Double clicking on the jar file should start the game.

2. Option 1 does not work (Windows only).

Download the game + java from Google Drive, no login required. (~30 MB)

The game can be downloaded as a zip file that contains both the game and a private Java runtime. No installation is required, just unzip it somewhere and double click the “darkmines.exe” file.

Note that button to download the file can be a bit hard to spot on Google Drive. See the screenshot below.

Download from google drive


Legal stuff:
The software is distributed under the Beerware license which I think is funny. The software does contain code from JGame (by Boris van Schooten) which uses a BSD license. The full license text can be downloaded here. Basically it just says that you use it at your own risk and are not allowed to steal the JGame code.

Picking up where I left off

The work on getting the dog to render correctly seemed very easy. But then I realized that the code was not getting any more readable. In fact I had a hard time figuring out how things worked. For all the goodness of JGame to get me started on this project, it seemed I was reaching the limits of what I was willing to work with.

fuu_big-thinking

So I did what any developer would do. I went out to refactor the code to structured more to my liking. Without going into the details: I failed. I came a long way, but in the end I managed to confuse myself so thoroughly and became annoyed with the work.

fuu_big_fuuu

I took a break from refactoring, days became months, months became years and a thick layer of dust formed on this project. Fast forward to 2015: a long hiking (tramping) holiday has me buzzing with inspiration. A good six weeks in New Zealand has brought me many new ideas on how to make Dark Mines a great game. Lots of new ideas for mechanics to play with, and some new and improved story-lines to boot.

hiking in new zealand

But first the project needed a bit of realism and some good advice on how to proceed. Thx to Extra Credits and their episodes on creating your first game I gained some perspective on why I was failing so hard. I need to down-scope the project and chunk it better. Extra Credits proposes that your entire game is created in one month. Now I’m not settling for a final game that I can make in a month, but I am willing to work on milestones that have that kind of deadlines. Also this gives me the option to fail faster, that is: to receive feedback on where my game is failing to amuse.

So instead of blogging about the great new features I came up with, I will instead focus my current new surge of energy at creating a minimum game (minimum viable product) and seeing what people think of it. But what kind of features are missing from my current prototype to have it be ready for testing? Well actually I already have everything in place to allow testing. In fact: I have too much game right now. The whole business with throwing stones at dogs around distracts from the core concept of the game (which is exploring). So my first milestone release will feature less features than I currently have implemented :)

Dark Mines – milestone 1 – includes the following features:

– Player walking around in randomly generated caves
– Collectible gold ore
– Acid streams

I even removed the traps from the first milestone to concentrate fully on the core of the game: walking around and finding paths to collect gold ore.

Now the real challenge for this milestone is in how to package and distribute the game. It is a Java game, but I cannot assume everyone has Java installed. One option is to compile the Java to a native Windows executable, but the process is non-trivial and it excludes Mac users from running it. Another option is to bundle the Java Virtual Machine with the game. The game file is only ~ 650 KB but the JVM adds another 130 MB. But looking closely at the distribution license, I can remove about 43 MB of JavaFX and other stuff, so I end up with a game directory of 88 MB, and a download zipfile of 30 MB. This is much better than I expected!

And I’ll just give anybody downloading the option of downloading only the self-contained jar file for those people that do have Java installed.

Critters

It is high time to put some moving opponents in the game. And the first candidate is a simple critter, an animal that is trapped in the dungeon and will attack you on sight. This certainly is not a hack and slash game where you will have to defeat every opponent. But the fact that you must fight some opponents will make those that you cannot win from more scary.

My first critter is the wild dog. It will home in on you and inflict a single HP damage when it hits you. After a charge it will flee from you for a certain cool down period, and after this it will charge you again. Thanks to the default building blocks of the JGame package, most of the ‘home in’ and ‘flee’ behavior was already provided, so I could focus on graphics and animations. And soon the wild dog was tearing me apart as soon as the game started.

So I immediately had the urge to defend myself. What is the weapon of choice for our stalwart hero? A broadsword maybe? Or a stylish katana? Yes, you guessed it: since this is a horror game with a mining theme, you get to defend yourself with rocks. (Maybe I’ll throw in a pick axe in the future if I feel generous.) So I rewrote the light stones to become thrown rocks. Also simple with JGame. It was only when I worked on the interaction between the rocks and the wild dog that I had to -for the first time- really understand how JGame handles collisions. And for all its greatness, there is still something to be desired in variable naming in the code of the JGame engine…

Anyway, after that the fun part ensued with deciding how the critters would react to damage. I immediately decided that critters are not suicidal and will have several thresholds of damage to manage their behavior. Up until a certain amount of damage they just keep attacking. After that they will flee away. If you manage to do more damage their speed will gradually decrease until they collapse. Even then they are not dead, you have to consciously add a fair amount of extra damage to a collapsed animal to kill it. That should reduce the ‘arcade’ feel of the combat a fair bit.

One of the JGame tricks I relied upon previously is that it is trivial to place a text on the screen and have it slowly move in some direction, and optionally cycle through colors. I use this as a cheap alternate to animation effects, so I tried to find a text that would best convey that you had hit the dog. I experimented a little and found that an almost trivial approach works wonders. Instead of stating the amount of damage done, I just render a red dot that slowly moves down and quickly disappears. This dot becomes a blood splatter that shows you the impact of your rock.

Now comes the tricky part. Since JGame does not natively support lighting, the critter always renders at maximal light intensity (and does not have to good decency to not render when the player cannot see you) completely ruining the realism. So I had to think of a way to link the line-of-sight and light intensity to the rendering of the image of the animal. And here it greatly helped to ponder the problem for a while without actually touching a keyboard. A few days and trip to the Dolfinarium later I had unconsciously put it all together. I had to introduce a new entity that would represent all non-tile things in the game that appear in a cave. I named it the Sprite inspired by my C64 youth. My good programming habits paid off, and I already had all the hooks in place that I needed to link sprites to the tiles of the map and in one evening I had sprites that changed light intensity with the tiles they inhabited. Voila presto!

Visualizing darkness

The Dark Mines project lay dormant for a good many month until I picked it up again. Probably not a terribly smart idea considering that I’m simultaneously working on two other big projects at the same time (X-files board and role playing game, and Ld50 Larp event) but who cares!

After playing a couple of levels I decided that I did not like the way that traps emit darkness. If you look really carefully at the lights around a trap, you can see that there is less light around it than you might expect. But the difference is hard to see, and that is not the point of the game. You should be apprehensive whenever you encounter darkness. ‘What will it be? Danger or reward?’ But right now it’s so hard to spot that any apprehension is not likely to happen. So I gimped a mock up of what I wanted: that the edge of the dark area be visible as an orange shine. A sort of aura around the darkness.

Some weeks later I implemented this in the form a circle of light that is placed at the edge of the dark area. On the way I learned some more about the subtleties of the gimp and how Java handles bitmaps. I also had to make some additional engine changes. First of all JGame does not like sprites with alpha values.

Side tangent: did you know that the PNG format and the standard Java image library natively support an alpha value for each pixel? This means that you can have nice soft edges on your sprites… or that you can create a nice aura bitmaps for your darkness. The Gimp handles these alpha values as well (of course).

As said: JGame takes special care to remove any alpha values and once I found that out it was trivial to remove that code. Secondly JGame can only parse a 1D strip of images, not a 2D grid. I created my aura as a single image from which JGame could create the sprites so I wrote a little utility that converts 2D image grids into 1D image strips. I may consider to rewrite how JGame loads images to have it natively support grids of images, but this would require me to tinker with the configuration engine, and I don’t want to do this just now.

In the end, I have a mechanism that overlays the edge of a dark area with tiles from the aura. And I am very pleased with the results!

The aura only shows up in tiles that you have a line of sight to. And it works! In test runs I now see the aura of a trap clearly, and have to consider how to move around it.

Traps!

Now that the lighting and field of vision was in place, it is time to add some dangers to the cave. My first idea was to add static traps. Traps that consist of a line of dangerous material that damages you if you walk through it. I implemented it and immediately found that the traps look like water streams instead of ‘traps’. So I changed the color to purple and renamed them acid streams.

The acid streams allow me to tinker with stats, hit points to be exact. (I’ll figure out a proper vocabulary along the way, for now I’m sticking with D&D terms.) Crossing an acid stream causes 0-3 HP damage, where 0 is the most likely outcome. Also: most of the acid streams emit a very soft light to make it easy to detect them at a distance.

Traps attempt 2. This time the traps are actual proper traps. Nasty devices that shoot at you if you touch the trigger wire.

Of course the trigger wire is not visible to the player, who has has to guess which way the trap is aligned. If you are able to touch the trap, you disable it. And if you guess wrong, you receive 4 HP worth of damage.

But even more importantly: this is where darkness starts to play a factor in the game. So its time to explain the grand idea that my enthusiasm is built upon. The basic twist of Dark Mines is that there are monsters, but you don’t actually get to see them, as they hide in the dark. Or more specifically: they emit darkness to stay hidden. Monsters in Dark Mines are extremely dangerous and your hero knows this. He cannot and will not fight them. Even worse: if your hero has been in their presence for too long, he will flee for his life and exit the level.

Now in order to make it interesting: darkness can contain one of three things: monsters, traps or special treasure. The special treasure being dark ore, the stuff that emits darkness.

OK, back to traps. The trap needs to emit darkness. I already have light sources increase the light intensity of a tile, so I edited them so that they could also reduce the light intensity. And after some (and then some) tweaking I got this.

If you look carefully you can see that the shape of the lighted area is very different from other images. It is not a round shape of lighter tiles, but the shape is ‘dented’ where the trap is.

At this stage I decided it was time to fix those unnaturally bright tiles amidst all my carefully calculated lighting. I changed the loading of graphics so that it automatically calculated several versions of each tile with decreasing brightness. Now finally the ore tiles do not stand out anymore :)

Light and darkness

By the time I had a working level, I had spent about a weekend coding and I was ready to indulge myself. On Sunday evening I decided to tackle to problem of line-of-sight. Up until now I used a very, very simple algorithm to determine what you can and cannot see. Everything within 6 distance is drawn, the rest is ignored. This means you can see into and through walls, which is not very realistic. You should only see tiles that are not hidden behind other tiles. A very basic way to find out which are those tiles is to draw lines from the hero to the edge of his field of vision. Draw all tiles on that line until you reach a wall. Stop and continue with the next line. I guess this is 2D ray tracing. My first experiments did not work at all. At one point I got some kind of result, but somehow some tiles remained bright even if they were outside the field of vision.

I made some improvements to my code, but found it hard to see what was going on. So I added numbers to each floor and wall image. 5 = bright, 1= dark. I now started understanding what was going wrong. This was not trivial, and would require me to come up with some actual algorithms myself, rather than steal borrow them from the internet. It took some evenings the week thereafter to get it right. I won’t go into details, just suffice to say that lighting and line of sight is a pain.

By the way: notice that the area around the stairs is lit as well. I thought it to be a nice touch if there was light coming from above. Light to guide you back home.


I finally got it the way I wanted it. Not only did ray tracing work well with lighting, light sources in the distance would be less bright than light sources closeby. The image below shows this. Both the stairs and our hero have the same lightsource intensity, but the stairs are far away.

The distance between the hero and the stairs in the above picture is about 16. I increased the line of sight significantly to be able to spot distant light sources. The new maximum range is 19. This means a lot of ray tracing for each frame and by now rendering a frame consists of 5 ms ray tracing and less than a millisecond drawing.

After having all this in place, it was easy to add the option to drop new light sources. Our hero can drop light gems that emit a bleak red light.

On december the 6th 2011 I had an idea for *another* new game, that I call Dark Mines. I wanted to make a simple 2d maze exploring game where you play as a dwarf who explores the Dark Mines and collects valuables. I have some ideas to make it intersting, and I’ll get to those later.

But first I was curious how fast I could implement a very simple 2D maze crawler. So I headed out to trusty old Google.

First step: find a 2D games engine in Java or Flash. I examined a few projects and finally stumbeled upon JGame. Wow, that is exactly what I need. A 2D Java engine that has support for tiles and sprites. It has lots of sample games to allow you to easilly understand the code. And it is completely open source, so I can edit/extend the engine as I see fit. One of the games included with the JGame library is Dungeons of Hack. A simple Gauntlet style game that contained a very good starting point for my game, namely: walls and a walking main character.

So I removed all the code relating to actual game mechanics of Dungeons of Hack and was left with the ultimate basic setup: my hero in an empty room. (Note that I did not change any graphics from Dungeons of Hack, so my ‘dwarf’ looks more like an elf for now. )

Next step is to make the map interesting. Dark Mines is situated in caves, so I needed convincing 2D cave maps for this. I have played a lot of D&D so I know I could draw these and convert them into a square pattern. But then I thought that it would be much more fun if the maps were generated. This way I could enjoy the game as wel. But how do you generate a 2D cave structure? Off to google once again.

After some searching through dry algorithms I found someone who had not only implemented it, but also found parameters to generate nice caves.


Cellular_Automata_Method_for_Generating_Random_Cave-Like_Levels

And before the night was over, my characters was walking through a generated cave.

Now the idea is that you explore the Dark Mines, so I needed to limit the field of vision. JGame does not support this natively, so I got my hands dirty and started hacking the JGame source code. My initial result showed that I indeed understood what I was doing.

And now for the big one. Dark Mines is not called Dark for nothing. It has everything to do with what you can and cannot see. So I needed to add lighting to the game. This is a serious extension of the JGame engine code, and I started simple. Manually craft images that get progressively darker and use those to make tiles close to you appear lighter than those far away. This is where the real work started, but the resulting imagery is much more atmospheric. Good.

At this point I started wondering about performance. The current version of the game moved very fluidly, but I had no idea how much computational power I had ‘to spare’. Java is not generally used for video games and has an undeserved bad reputation for performance. Since I was already thinking about wild things you can do with light, darkness and multiple light sources, I had to know if I could get away with ignoring performance for now. So I added a few log lines to tell me how many milliseconds it took to render frame. To give you the short answer: it took 0 milliseconds to render a frame.

0?

That can’t be right. And indeed, it was not right, but near enough to be useful. I added nanosecond timing, and found that it took 0.2 milliseconds to reneder a frame once the Java Hotspot compiler had done its work. I also discovered that the millisecond timer of Java is just not very accurate, as it jumps in steps of 16 or sometimes even 30 milliseconds.

Anyway… 134 tiles rendered in 0.2 milliseconds. Wow! I asked several collegues of mine (who are professional Java developers) how many milliseconds they thought it would take, and their guesses were between 20 and 200 ms. It’s nice to be surprised in such a positive way. So no worries about performance for now, just concentrate on game content.My next step was to have a proper starting point for my hero. Up until now I just dumped him somewhere in the cave and hope that he was not instantly stuck in a wall. To solve this I decided to create a corridor that starts at the center of the left side of the map and would go inwards until it met a free space of the cave. I cannot easilly explain why I get so much joy out of writing such simple algorithms. The fact that the cave generation code realy does just what I described, gives me great pleasure. Maybe its because how it works in my mind is matched very closely to how it works in code… Anyway: add a stairs icon and go.

Time to add some actual “game” elements. First up: valuables. Since it is a mining game, the valuables come in the form of gold ore that is stored in cave walls. I wrote a level generator that placed gold ore tiles in places that a player could reach. The result clearly shows the resulting ore tiles.

In fact: the resulting ore tiles show up a bit too clearly. I did not make multiple versions of this graphic for different lighting intensities. As a result the ore tile will always show up bright, regardless of how much light is calculated to be at that tile. At some point I was going to have the game engine calculate different versions of each tile for different lighting levels. So no point in doing manual labour now.

Speaking of labour: the ore does not collect itself. I considered several options and decided to go for the most simple and intuitive one. Just walk into the ore to collect it. And to make it a bit more like you’re hacking it out of the rock: you need to hit into it several time. In terms of code this was my first experiment with collisions between tiles and the main sprite. JGame solved most of the problems for me, but this is where the JGame code starts to get complicated. Anyway: the results are still good.

Now in order to complete the ‘minimal level’ approach, I added detection for when you reach the stairs.